The modern church has somewhat ruined the Bible talk of “spiritual warfare” – the verses are repeated too much. Yet, recently I released that the absolute best way to handle some strange bits of thinking (scrupulosity, OCD) are to immediately classify it as a spiritual attack. Identify it as such and move on immediately.
Parenting
When a child is egregiously rude, what to do? Demand an apology? Punish? That might work for a child but as children get older it can often drive them away. Some older children may respond well but what of those who will not back down and only escalate? The best parenting technique in this case is perhaps to be “soft”. Don’t immediately force apologies, etc. for bad behavior. Let your stance be known, then wait. This is how God treats us. We known God’s standard but he is very long suffering.
Removing silent wav files
I use the following script to copy files from my 16 track stems. The script copies the files over, then uses sox to find “silent” files and remove them.
#!/bin/bash
#
# February 12, 2025 (Wednesday)
#

echo "Copying files to ~/Music/incoming_mixer_files/"
#rsync -va /Volumes/NO\ NAME/Records ~/Music/incoming_mixer_files/
EXIT_STATUS=$?

# Check if rsync was successful
if [ $EXIT_STATUS -ne 0 ]; then
    echo "Error: rsync failed with status $EXIT_STATUS"
    exit $EXIT_STATUS
else
    echo "Files copied successfully to ~/Music/incoming_mixer_files/."
fi


find ~/Music/incoming_mixer_files/ -type f -name "*.wav" -exec sh -c '
    for file; do
#        echo "Processing: $file"

        # Get RMS level in dB directly
        rms_db=$(sox "$file" -n stats 2>&1 | awk "/RMS lev dB/ {print \$4}")

        # Check if below threshold (-65dB) - comparing as a number
        if [ -n "$rms_db" ] && [ $(echo "$rms_db < -65" | bc) -eq 1 ]; then
            #echo "SILENT FILE DETECTED: $file (${rms_db}dB)"
            mv "$file" ~/.Trash/
        else
            echo "Active file - keeping: $file (${rms_db}dB)"
        fi
    done
' sh {} +
Behringer UFX 1604 mixer shows “nac” when trying to record to usb
If your Behringer UFX mixer shows “nac” when inserting a usb you need to move the switch in the back to the middle position “Stand alone” mode. If the mixer is in usb or firewire mode the standalone mixer will not function.

Once in stand alone the message “FSE” (or maybe “FOR”) means the drive needs formatted. Press the flashing green “Play” button to format or the Stop button to cancel. I’ve not had much luck with this though. I remember it worked in the past so I am curious if newer, larger usb drives are the problem. Update: large drives are no a problem. I was able to record to a 128GB usb thumb drive. I had many drives that would not work after formatting different ways on both a mac and windows computer. I think the issue is some thumb drives are of very low quality. If you are using randing old drives you had laying around they may be on the verge of failure. Just a guess…
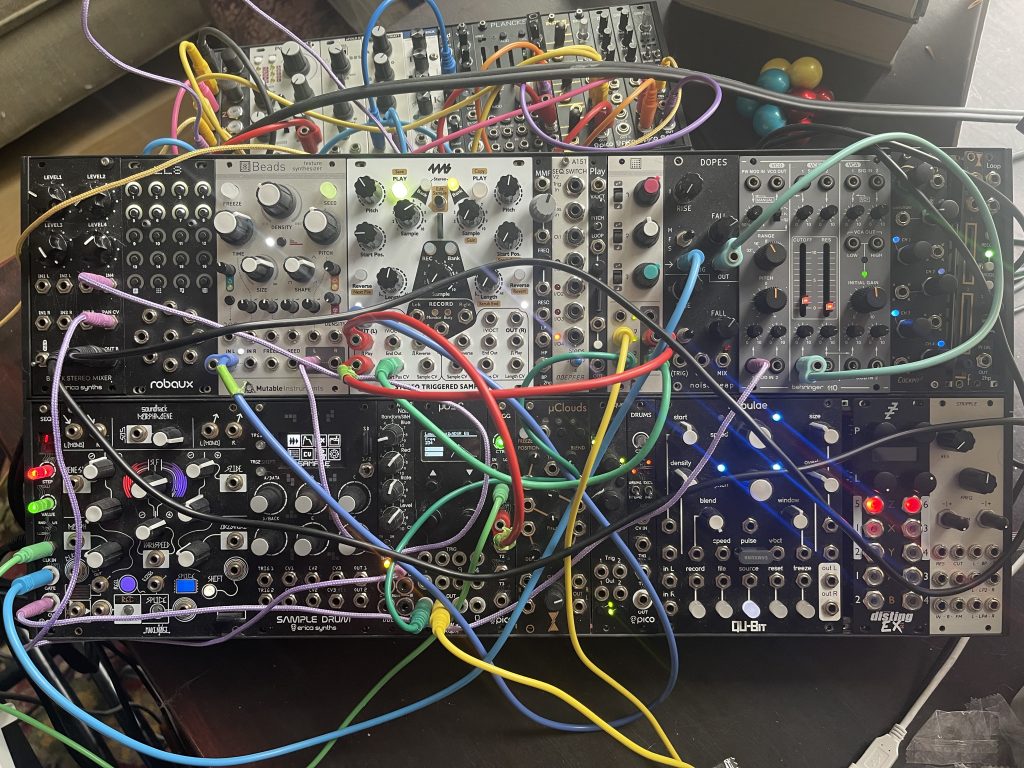
Patch Notes
4ms Stereo Triggered Sampler plays a user recorded sample of a marimba type sound playing a musical phrase
Hemispheres LowerRentz (the first time I’ve used this in a patch) :
Freq 234
Rho 22
X goes to Mutable shades with 2 o’clock attenuation, then to 4ms Start Pos CV
Y goes to Mutable shades with 12 noon attenuation, then to 4ms Length CV
Erica Trigg triggers STS play input with steady pulses
Output of 4ms goes to Erica Black Stereo Mixer channel 4
Channel 4 Pan input is controlled by A118-2 RND output
Recorded into Ableton Live February 6, 2025 (Thursday) 3:23pm
Compiling Mutable Instruments Peaks on osx Sonoma
Very rough notes on modifying peaks using a 2025 era apple os.
brew tap ArmMbed/homebrew-formulae
brew install cmake dfu-util arm-none-eabi-gcc
brew install arm-none-eabi-gcc
brew tap osx-cross/arm
brew install arm-gcc-bin

# Get the firmware:

git clone --recurse-submodules https://github.com/pichenettes/eurorack.git mutable_instruments_eurorack
cd mutable_instruments_eurorack/peaks
cd ..
git submodule update --init --recursive

cd peaks
ln -s ../stmlib stmlib

cd ..

git clone https://github.com/timchurches/Mutated-Mutables/

git submodule update --init --recursive

cd peaks
ln -s ../stmlib stmlib
# i think this may have failed so I copied it from the original repo
rsync -a ../mutable_instruments_eurorack/stmlib .
rsync -a ../stmlib .


# update the makefile
# you must edit the make file to point to the toolchain in /opt

TOOLCHAIN_PATH ?= /opt/homebrew/
edit the peaks/makefile
F_CRYSTAL      = 8000000L
F_CPU          = 72000000L
SYSCLOCK       = SYSCLK_FREQ_72MHz
FAMILY         = f10x
DENSITY        = md
MEMORY_MODE    = flash
# USB            = enabled

APPLICATION    = TRUE
BOOTLOADER     = peaks_bootloader

# Preferred upload command
UPLOAD_COMMAND  = upload_combo_jtag

# Packages to build
TARGET         = peaks
PACKAGES       = peaks \
		peaks/drivers \
		peaks/drums \
		peaks/modulations \
		peaks/number_station \
		peaks/pulse_processor \
		stmlib/utils \
		stmlib/system
RESOURCES      = peaks/resources

TOOLCHAIN_PATH ?= /opt/homebrew/

EXTRA_INCLUDES = -I/opt/homebrew/Cellar/arm-gcc-bin@10/10.3-2021.10_1/arm-none-eabi/include \
                -I/opt/homebrew/Cellar/arm-gcc-bin@10/10.3-2021.10_1/lib/arm-none-eabi/include \
                -I/opt/homebrew/Cellar/arm-gcc-bin@10/10.3-2021.10_1/arm-none-eabi/include/c++/10.3.1 \
                -I/opt/homebrew/Cellar/arm-gcc-bin@10/10.3-2021.10_1/arm-none-eabi/include/c++/10.3.1/arm-none-eabi

# Add these library paths
EXTRA_LIBS = -L/opt/homebrew/Cellar/arm-gcc-bin@10/10.3-2021.10_1/arm-none-eabi/lib \
             -L/opt/homebrew/Cellar/arm-gcc-bin@10/10.3-2021.10_1/lib/gcc/arm-none-eabi/10.3.1

# Add the path where crt0.o resides
EXTRA_LDFLAGS = -L/opt/homebrew/Cellar/arm-gcc-bin@10/10.3-2021.10_1/arm-none-eabi/lib/thumb/v7-m/nofp

include stmlib/makefile.inc

# Rule for building the firmware update file
wav:  $(TARGET_BIN)
	python stm_audio_bootloader/fsk/encoder.py \
		-s 48000 -b 16 -n 8 -z 4 -p 256 \
		$(TARGET_BIN)
and the stmlib/makefile.inc
# add the line
# $(EXTRA_INCLUDES) \
#
INCFLAGS = \
            		-I. \
                        $(EXTRA_INCLUDES) \
                        -D$(ARCH_DEFINE) \
                        -D$(MODEL_DEFINE) \
			$(APPLICATION_DEFINE) \
                        $(PROJECT_CONFIGURATION) \
                        -DF_CPU=$(F_CPU) \
                        -DF_CRYSTAL=$(F_CRYSTAL) \
                        -DHSE_VALUE=$(F_CRYSTAL) \
                        -DUSE_STDPERIPH_DRIVER \
			-D$(SYSCLOCK)=$(F_CPU)
and
LDFLAGS = \
    -Wl,-Map=$(BUILD_DIR)$(TARGET).map \
    -Wl,--gc-sections \
    -T $(LINKER_SCRIPT) \
    $(ARCHFLAGS) \
    $(INCFLAGS) \
    $(EXTRA_LDFLAGS) \
    $(EXTRA_LIBS) \
    -L$(STM32_PATH)

LDFLAGS += --specs=nosys.specs --specs=nano.specsOP1 midi input/ouput with iConnect Midi
I recently decided to connect my OP-1 to din midi via the iConnectmidi USB host. However, despite recalling this working fine in the past, I ran into various problems. In this post I will outline a few problems and solutions.
However first, let’s confirm how this setup should work when all is correct:
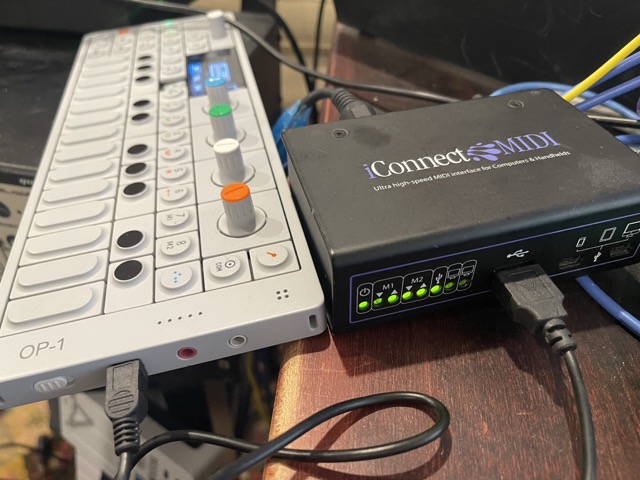
You should connect a standard USB cable to the front middle input of the iConnect MIDI (the Type-A jack, i.e., the type found on most computers). Once connected, you should see the green light near the USB symbol on the iConnect MIDI illuminated. At this point, MIDI input and output from the OP-1 should work.
You can set the channel on the OP-1 by pressing the “COM” button, select track 1 then press shift + “COM” to set the channel. The channel selected works as both the midi input channel and midi output channel. Midi clock is transmitted as well as start/stop.
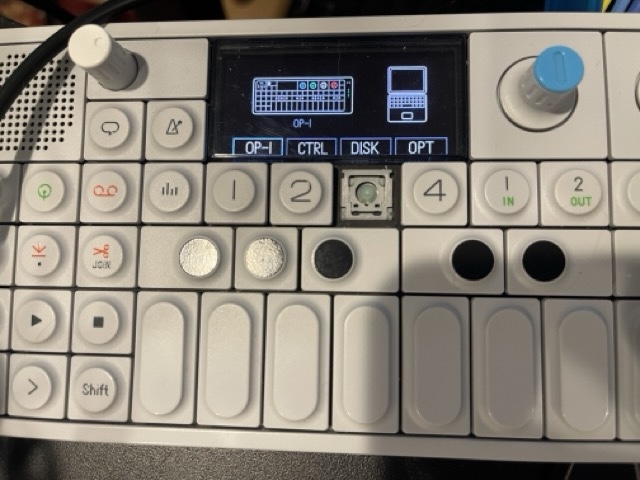
If everything is set up correctly, you should see the green light near the USB symbol on the front of the iConnect MIDI. When you press notes on the OP-1, that light should flicker to indicate MIDI activity.
In my case, I ran into problems, which may have been caused by a faulty cable. I initially swapped out the cable, and it worked immediately, leading me to believe the original cable was indeed bad. Some cheaper cables only provide power but fail to transmit data. However, after some time, the new replacement cable stopped working as well, even though the USB light remained lit.
I was able to resolve the issue by pressing the reset button on the iConnect MIDI. I’m not sure if the problem lies with the iConnect MIDI, the OP-1, or a more general issue caused by repeatedly connecting and disconnecting various devices. It’s possible that these actions caused either the iConnect MIDI or the OP-1 to lock up or become confused.
The OP-1 sequencers all send midi output and I was able to use them to play the Roland S-1 synth. I was also able to use the Korg SQ-1 to send notes into the synths of the OP-1.
Also of note, the Roland S-1 passed the incoming OP-1 midi clock to the S-1 sync out to drive the clock on my modular.
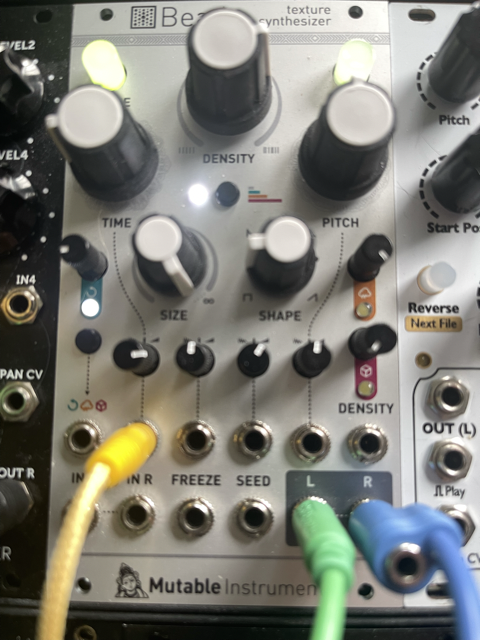
Mutable Instruments Beads remix patch
This will create an automated remix/blend of two tracks.
Play two bits of stereo audio track1 followed immeidatly by track2
press freeze
Density at 2pm
Pitch at noon
Time at 9pm
size at 5pm
shape to taste
peaks random lfo to time, attenuate at 3pm (optional – you can use the internal randomizer)
(optional) peaks random lfo 2 to shape, attenuate 1pm or to taste
wet/dry to full wet
size unpatched at 1pm
Compiling phazorville
Notes on the steps I took to add my apps to phazorville.
I believe the first time I used the arduino ide and the “old” method to create a firmware then likely manually uploaded it.
I tried today to use the “new” way. I did the following:
curl -fsSL -o get-platformio.py https://raw.githubusercontent.com/platformio/platformio-core-installer/master/get-platformio.py
python3 get-platformio.py
Which installed pio at :~/.platformio/penv/bin/pio
I could then compile with:~/.platformio/penv/bin/pio run -e pewpewpew
This placed the compiled firmware at :.pio/build/pewpewpew/o_C-phazerville-v1.7_phz-410d674dirty.hex
I added my own applets by putting the code into :
O_C-Phazerville/software/src/applets
and updating:
Update July 5, 2025
start fresh on macos:
git clone https://github.com/djphazer/O_C-Phazerville.git
cd O_C-Phazerville
ensure ~/.platformio/penv/bin/ exists
cd software
complile with:
~/.platformio/penv/bin/pio run -e prod
or to upload after build
press the program button on the teensy on the module
~/.platformio/penv/bin/pio run -e prod -t upload
you’ll need the teensy loader installed on your computer.
To add a new applet:
1. Create a new AppletName.h file in :
O_C-Phazerville/software/src/applets/
all the code (yes, the code) will go in the .h file
2. edit O_C-Phazerville/software/src/hemisphere_config.h
– add new lines for :
#include “applets/AppletName.h”
DeclareApplet<AppletName>{314, 0x02},
From Claude:
Steps to Add a New Applet
Create the applet file in /software/src/applets/YourAppletName.h
Use the boilerplate template from software/src/applets/Boilerplate.h.txt as your starting point
Implement required methods:
applet_name() – Return name (max 9 chars)
Start(), Controller(), View()
OnEncoderMove(), OnDataRequest(), OnDataReceive()
SetHelp()
Add include to software/src/hemisphere_config.h
Register the applet in the AppletRegistry with a unique ID and category flags
Optionally add documentation in docs/_applets/ The system uses inheritance from HemisphereApplet base class and template-based registration. Each applet gets a unique ID and category flags (0x01=Modulator, 0x02=Sequencer, etc.).
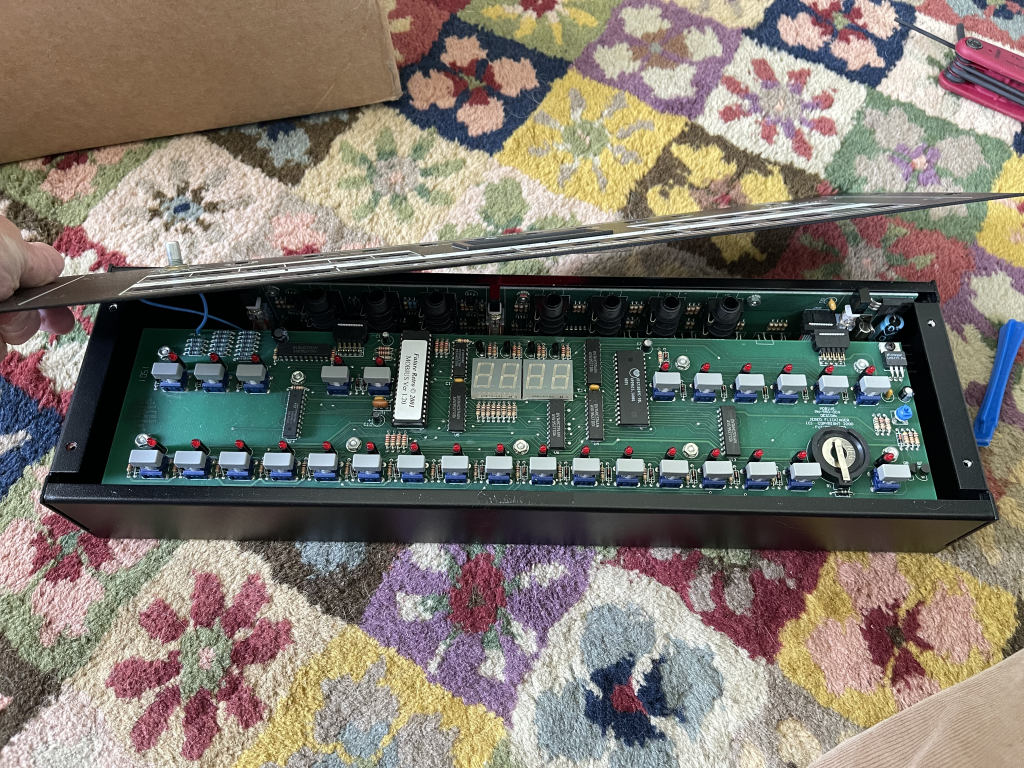
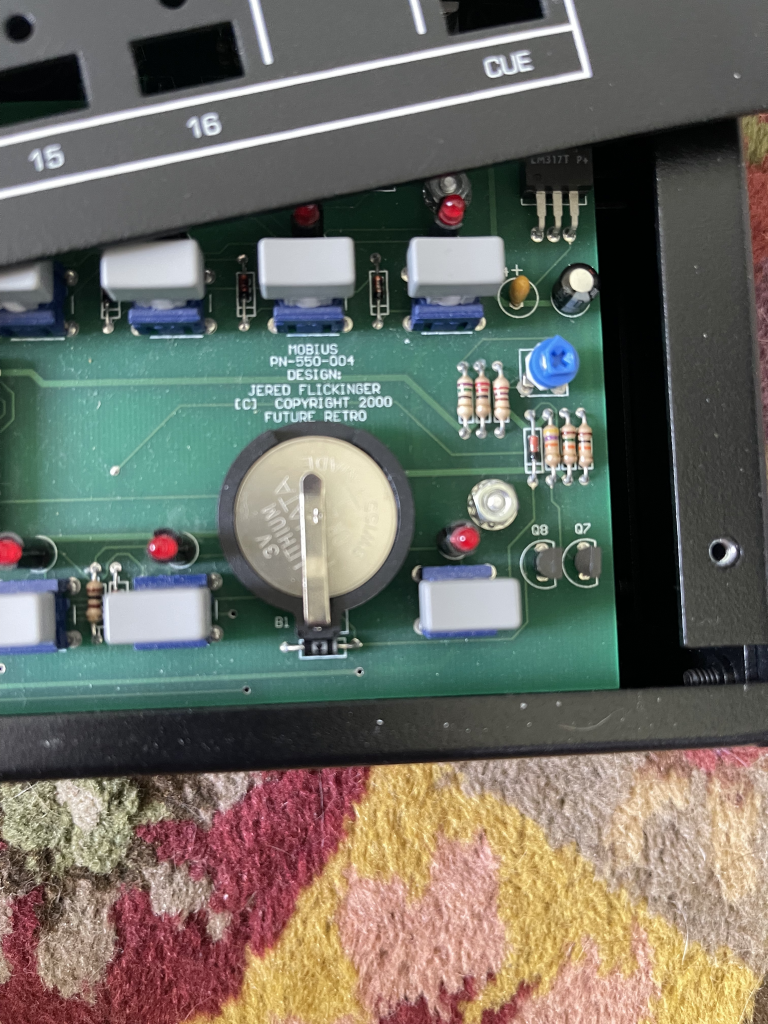
Future Retro Mobius battery change
I replaced the battery on my Future Retro Mobius. The installed one (I assume from the factory was a 3V CR2325. All I had to replace was a 3V CR2330. It fit and worked.
Here are some photos from the inside: